In this post, I am going to show you how to complete a mail-merge from an Excel table to Microsoft Word.
Finishing the process
In Mail-Merge Data Preparation, I demonstrated how you can prepare a data to be merged. I will be using the result table to complete a merge.

The Goal
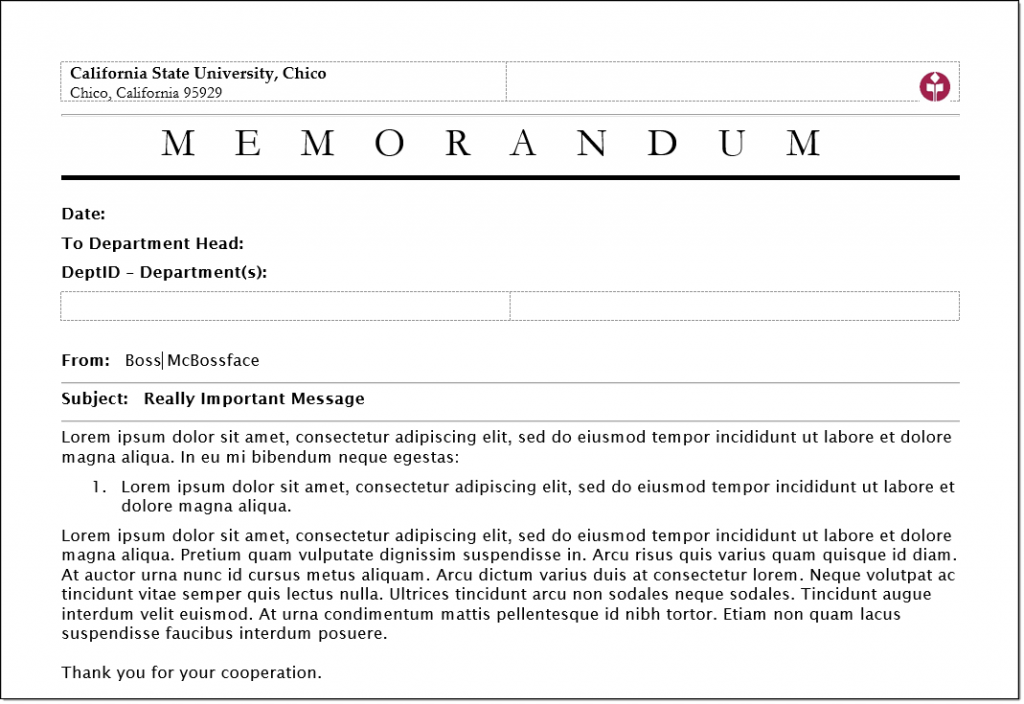
Our goal is to use the ‘MergeTable’ as a data source for the merge fields in Word, create one document/e-mail per manager, and list the departments who report to that manager.
The Word Document
Prepare the Word document according to your needs. In this example, we’re sending out a memo to the Manager’s.
Connecting to Excel table
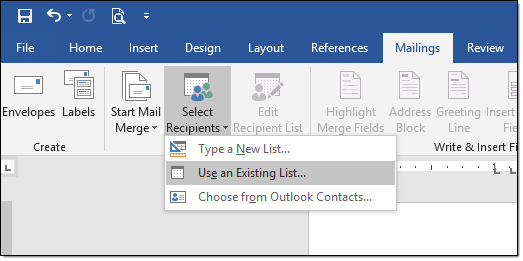
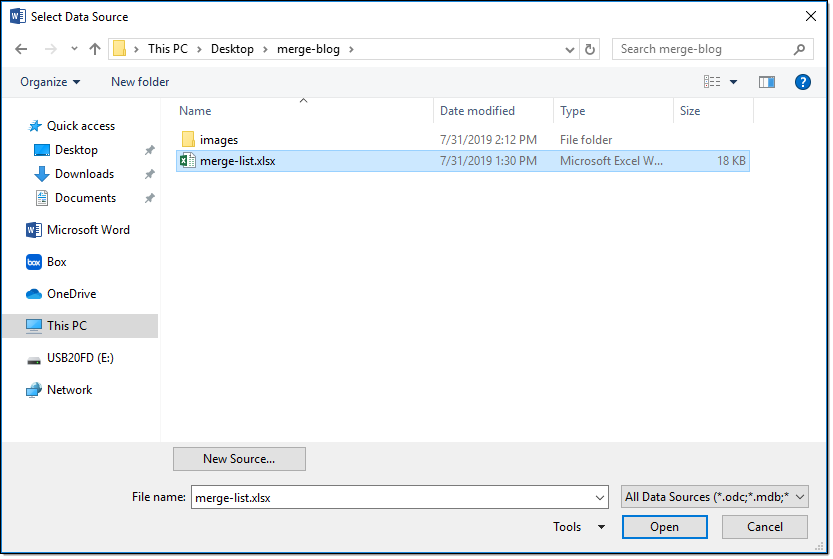
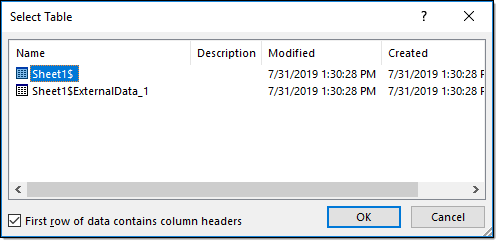
Insert Merge Field
If you successfully connected to the source file then you will have access to the field headers.
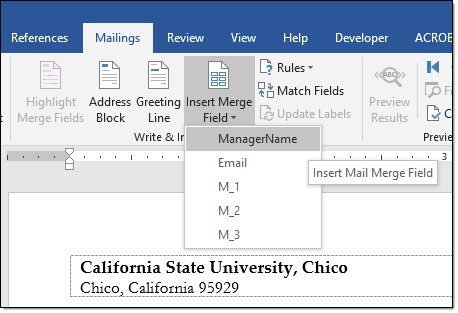

“Intelligent” Merge-ing
Being the Excel guru’s we are, we will not be statically adding the rest of the merge fields.
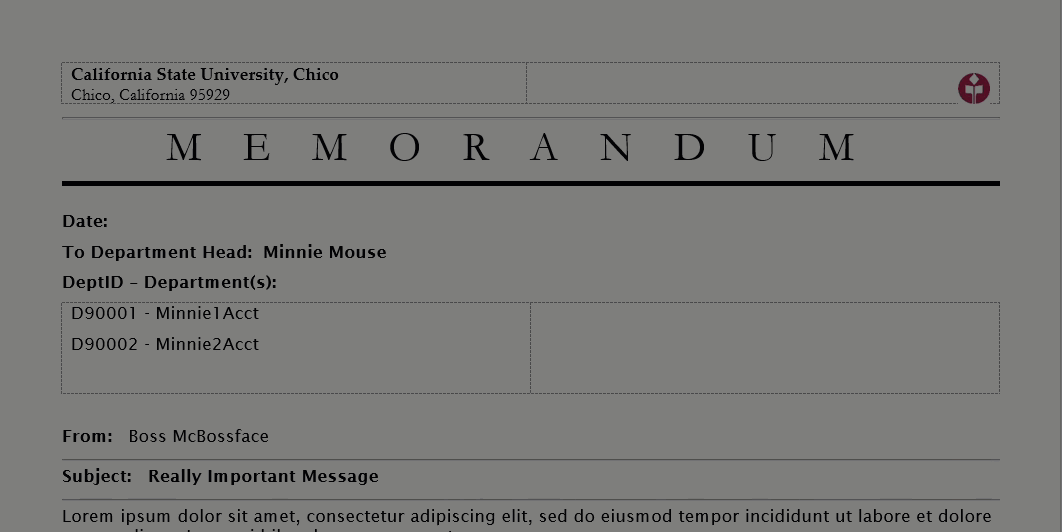
Do you see what is happening? Placing the merge fields statically means that you will always be using that white-space. Maybe that is fine for your project. In the actual project I did, having extra white-space was unacceptable.
Using IF fields
The article found at, https://wordmvp.com/FAQs/MailMerge/MMergeIfFields.htm, has a comprehensive article detailing the process.
The only thing I would add to the article is that it does not explicitly tell you how to line-feed or new-line; it really just demonstrates the in-line technique.
Adding a Return/New-line
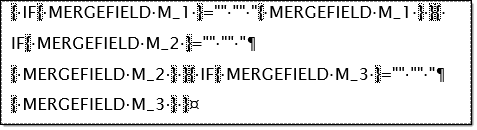
What you are really looking for is where I have placed the ¶ symbol.
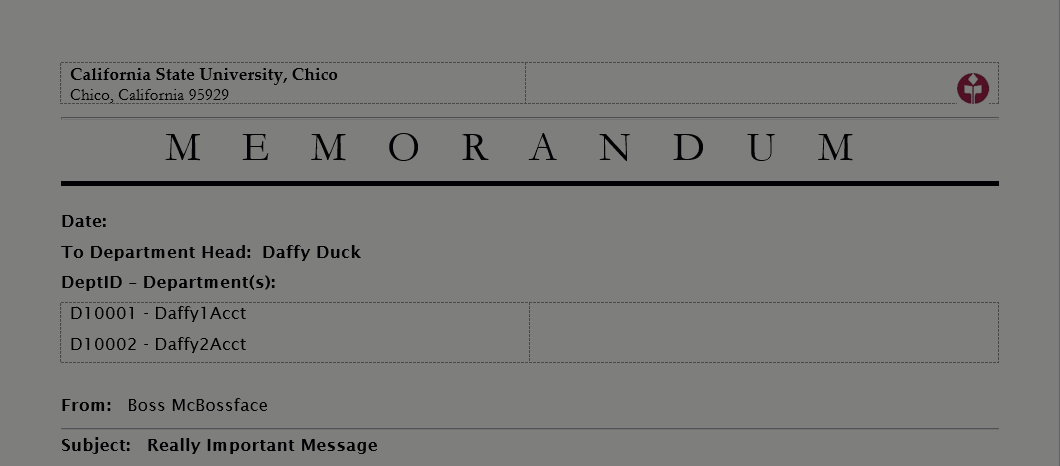
The result
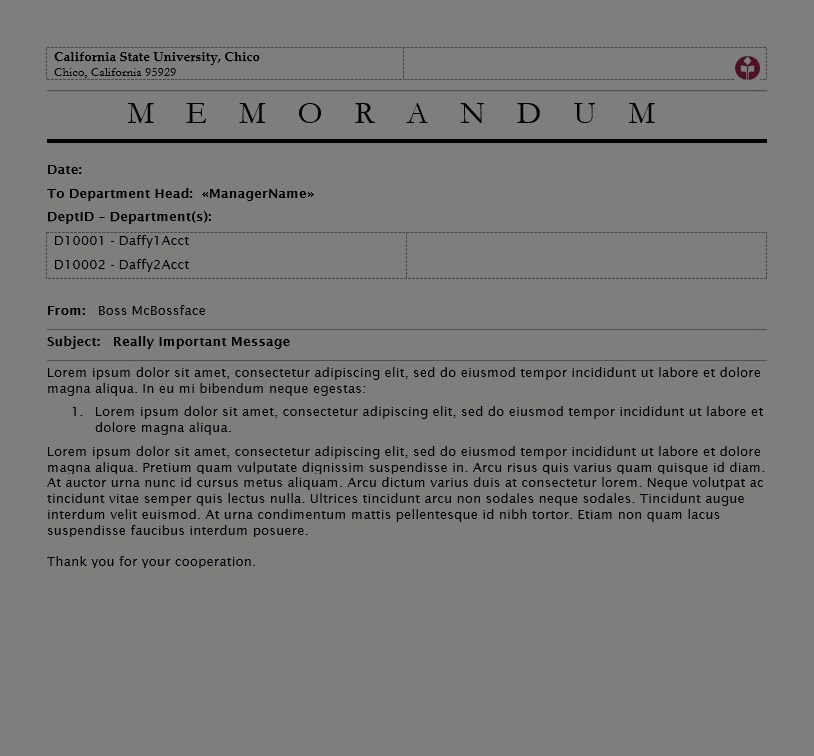
The result is a dynamic document which uses only enough space that is required. In the actual project, the maximum count of ‘DeptID – Department’ values was ten (10) with a minimum count of one (1). The requirement was to have a one (1) – page memo. Hopefully, this will help you excel at work!