…my cage, however, is that my organization invests into systems that support the student life cycle. Systems which support staff are very often de-prioritized, lost in the enterprise queue.
Today I would like to present my contribution to “Better Together” and how the Power Platform / Dynamics products work better together.
#BetterTogether using Power Apps & Power Automate
Joe Exotic (it’s possible)
Every three years, to start the big push towards physical inventory, the asset management office reaches out to the managers and directors with the main goal of identifying whom has been delegated the responsibility of conducting the physical inventory. The delegated persons will then be sent targeted instruction and information to fulfill the procedure according to policy.
Power Apps
The managers and directors will use Power Apps to interact with connections to SharePoint and Office 365 Users.
Power Automate
A recurring trigger will get the SharePoint items and convert to a CSV file to be uploaded into an AD group using a PowerShell script.
SharePoint List
I chose to use a SharePoint List because unfortunately there is no database view that has the information I need; it is in the queue.
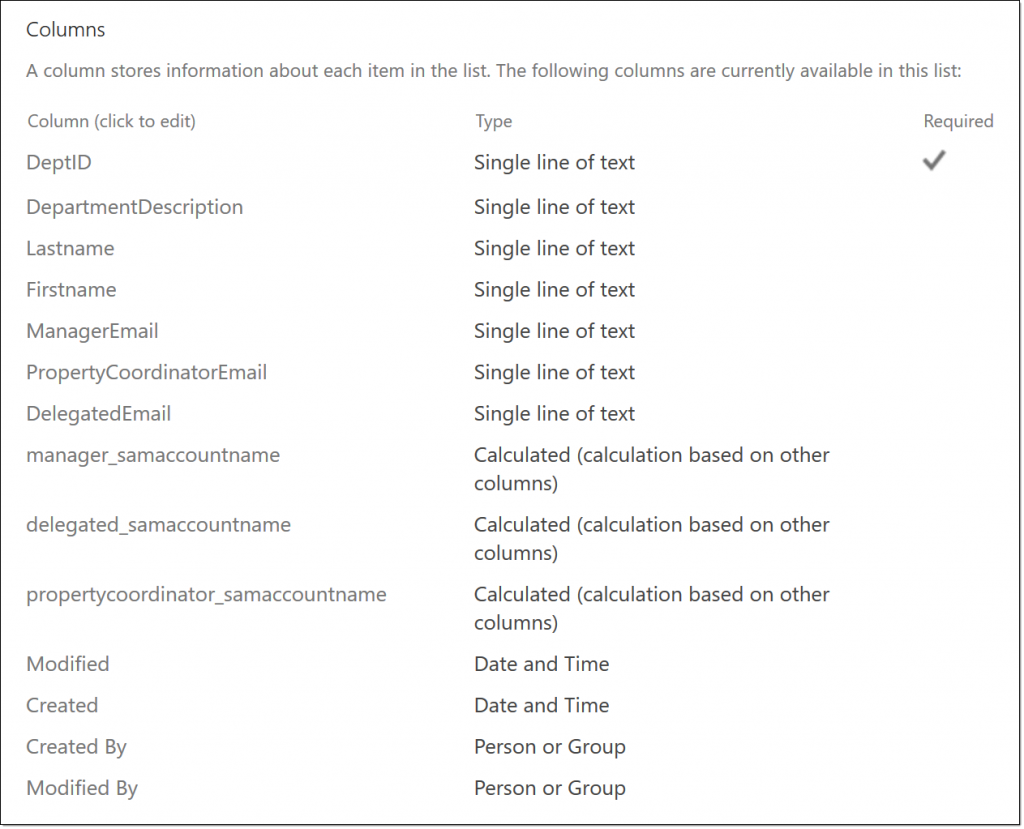
I did get fancy by adding a calculated column which I use to extract the samaccountname for AD.
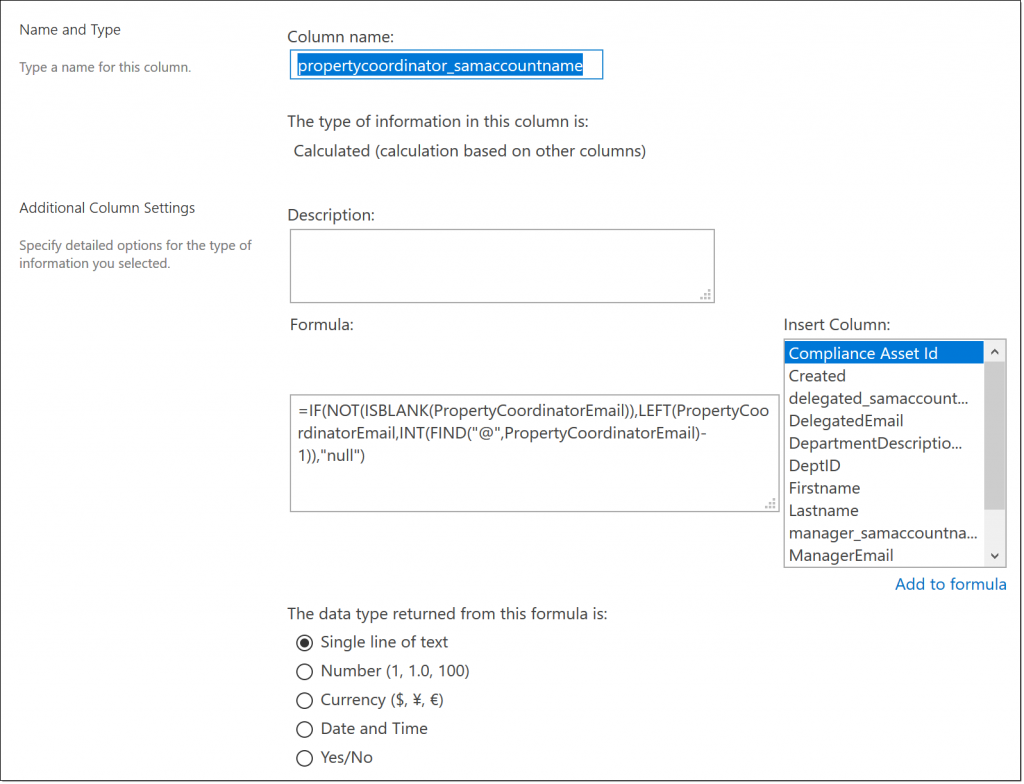
=IF(NOT(ISBLANK(PropertyCoordinatorEmail)),LEFT(PropertyCoordinatorEmail,INT(FIND("@",PropertyCoordinatorEmail)-1)),"null")
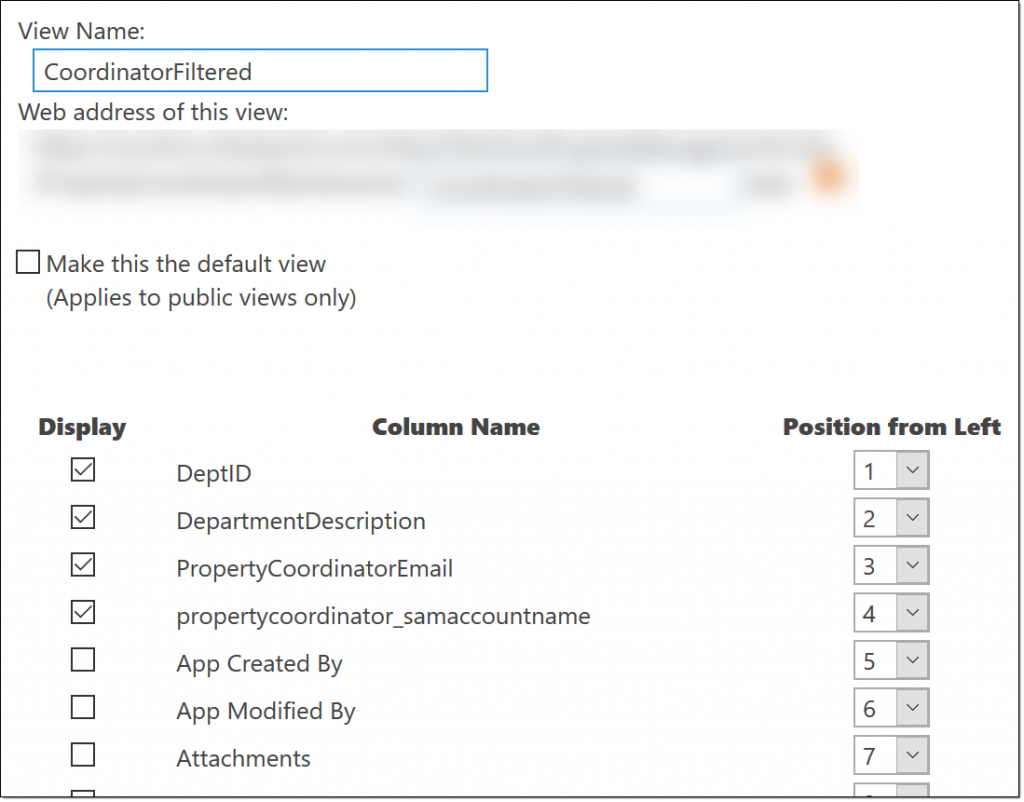
I created a view that I use later in Power Automate.
Power Apps
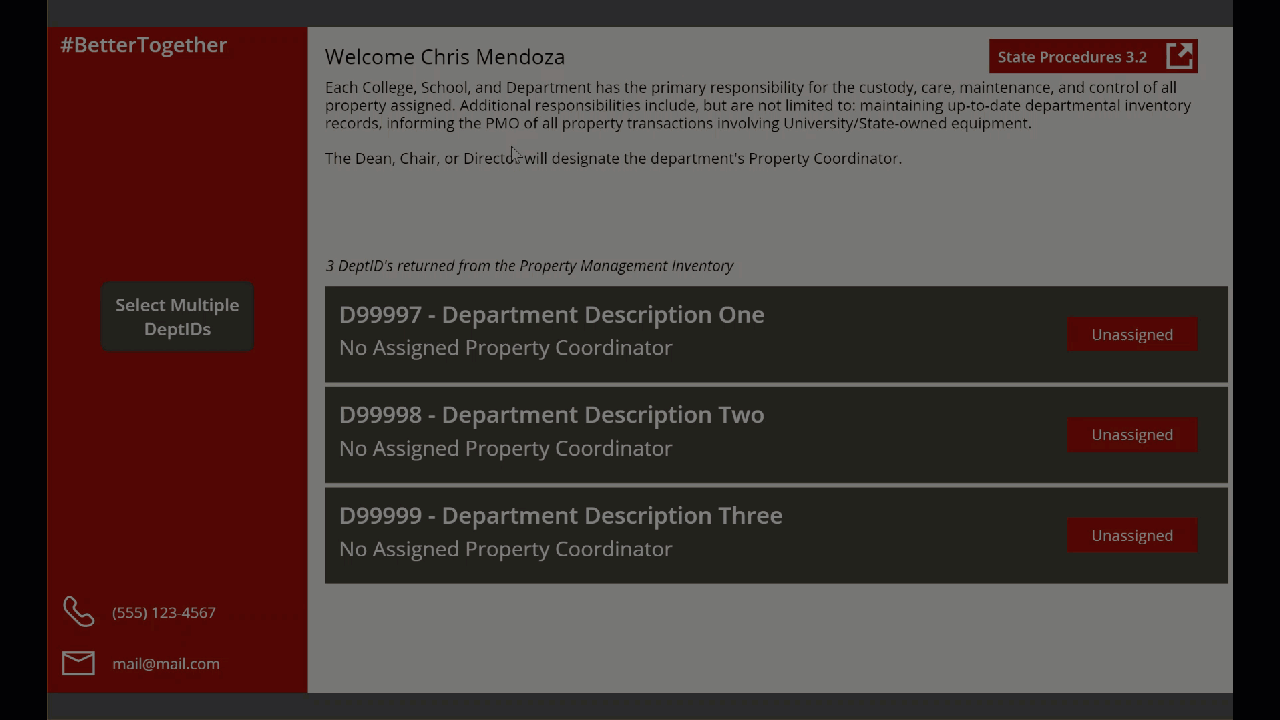
The welcome screen for the manager or director. In OnStart, I set a variable ‘_curUser’ which allows me to display a filtered gallery.
App > OnStart > Set(_curUser,User().Email);
GalleryDept > Items > Sort(Filter(PropertyCoordinatorMaintenance,ManagerEmail = _curUser || DelegatedEmail = _curUser),DeptID,Ascending))
Selecting Gallery Items
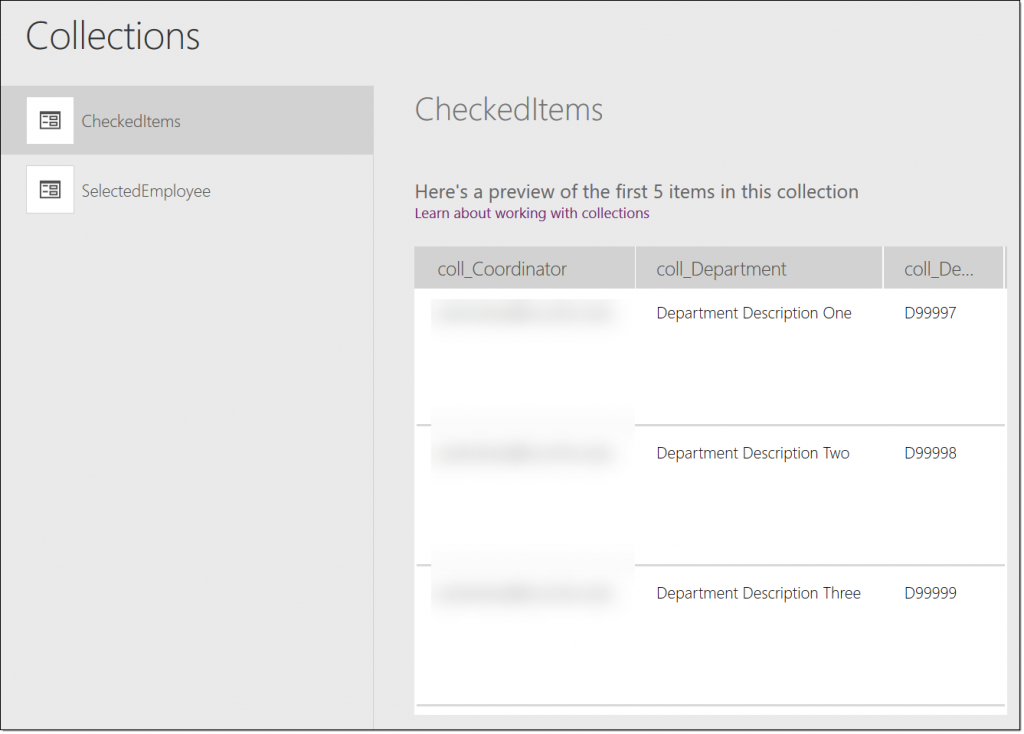
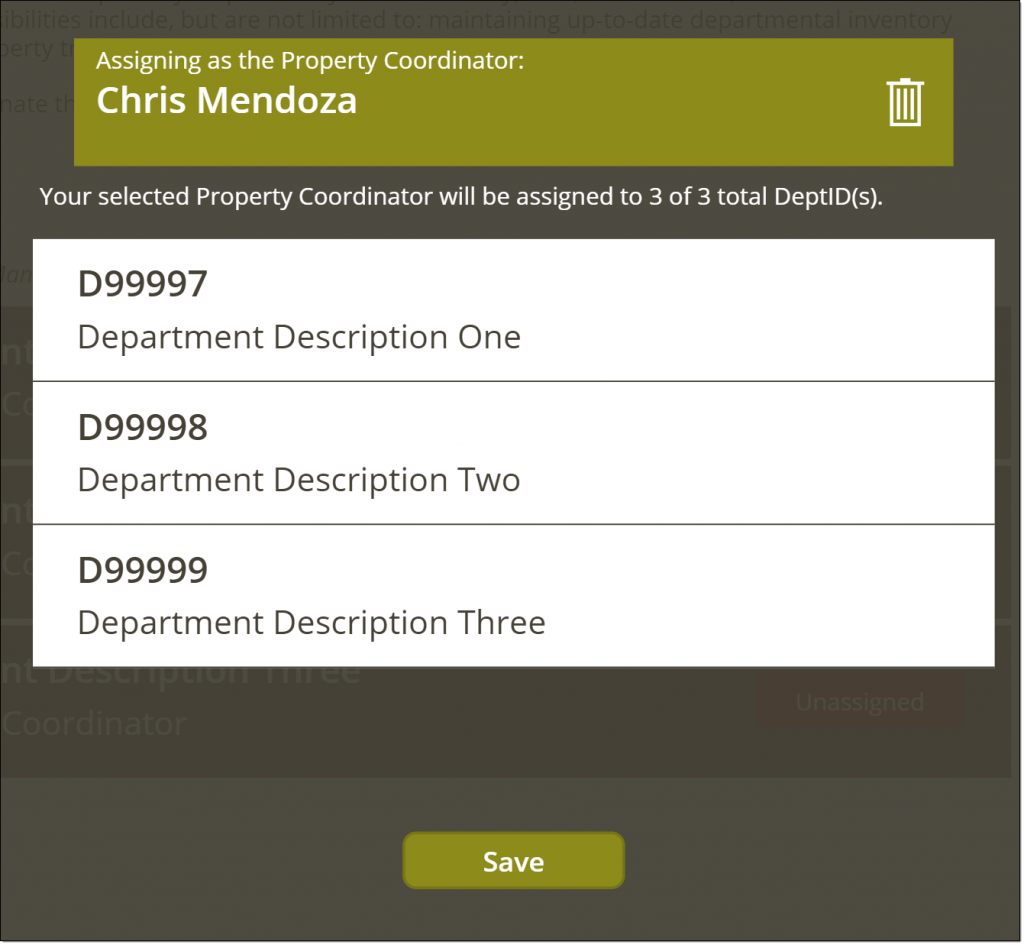
Most of the managers and directors have very few departments however, some have near a dozen. All departments need to be assigned a Property Coordinator. I decided to allow single selection, by clicking a gallery item or multi-selecting gallery items via a checkbox. Either way the item(s) are added to a Collection.
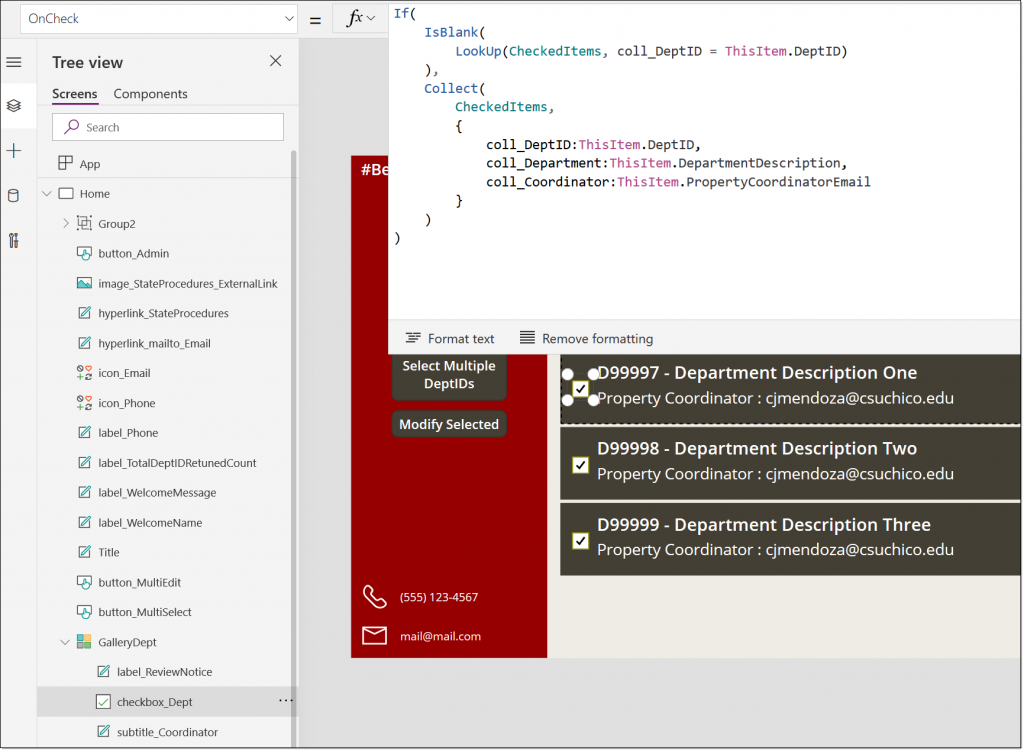
GalleryDept > checkbox_Dept > OnCheck >
	If(
		IsBlank(
			LookUp(CheckedItems, coll_DeptID = ThisItem.DeptID)
		),
		Collect(
			CheckedItems,
			{
				coll_DeptID:ThisItem.DeptID,
				coll_Department:ThisItem.DepartmentDescription,
				coll_Coordinator:ThisItem.PropertyCoordinatorEmail
			}
		)
	)
Assigning a Property Coordinator
Depending on the previously collected items, the manager or director can then select a person who they would like to assign the physical inventory task.
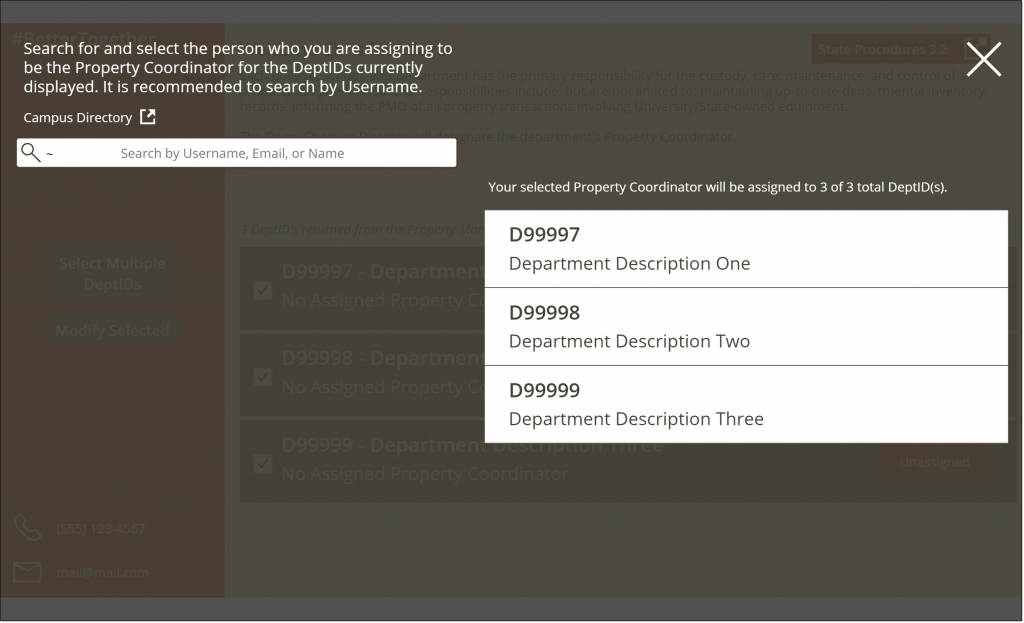
Using a simple text input box I can filter Office 365 Users.
GalleryEmployee > Items > Filter(Office365Users.SearchUserV2({searchTerm:textInput_Employee.Text,top:50}).value,!IsBlank(Department))
The !IsBlank( ) was added to filter the users results even more as I am only interested in staff and faculty; students do not have departments.
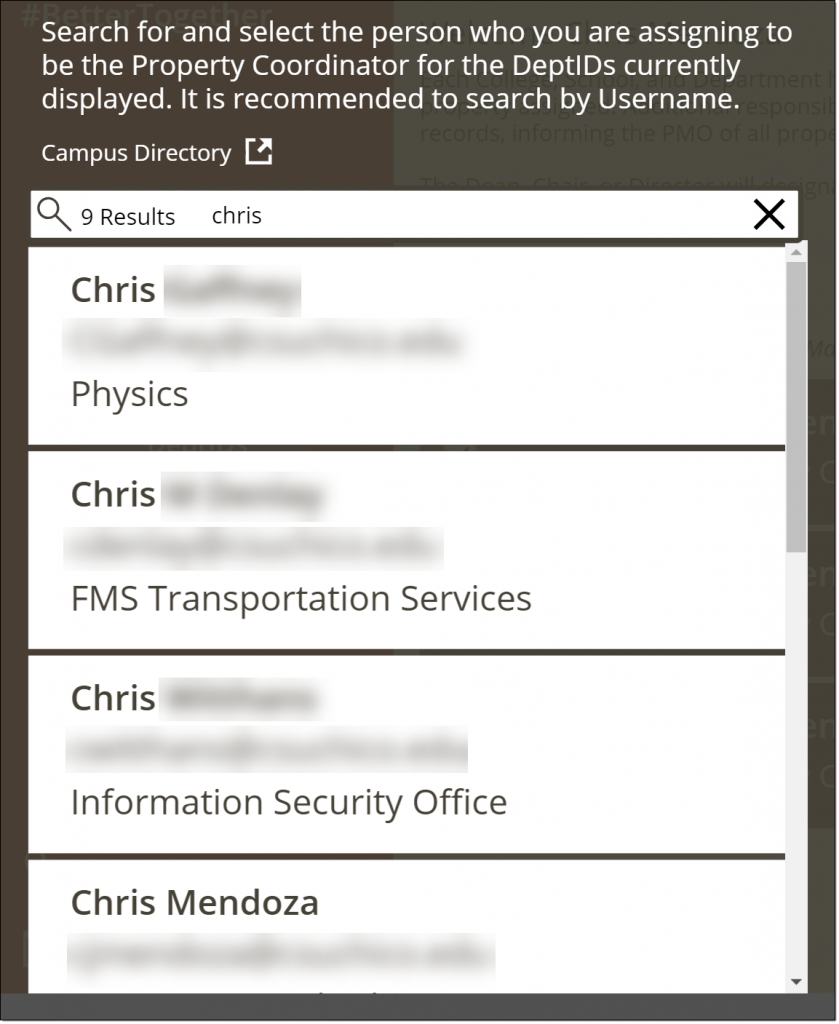
A selected item gets added to the ‘SelectedEmployee’ Collection.
GalleryEmployee > OnSelect > ClearCollect(SelectedEmployee,{coll_emplName:DisplayName,coll_emplEmail:UserPrincipalName})
Power Automate
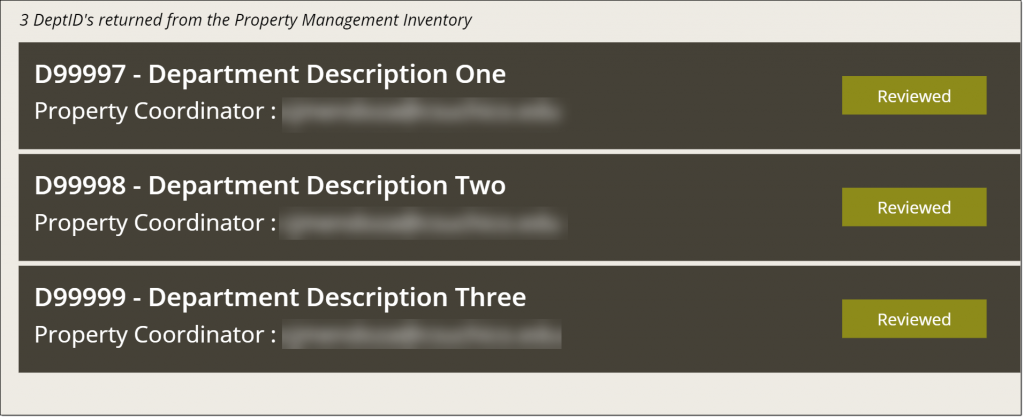
A recurring schedule runs a Power Automate flow to create a CSV file for import into AD. The detail file is also created at the same time only to provide a quick glimpse of the transactions.
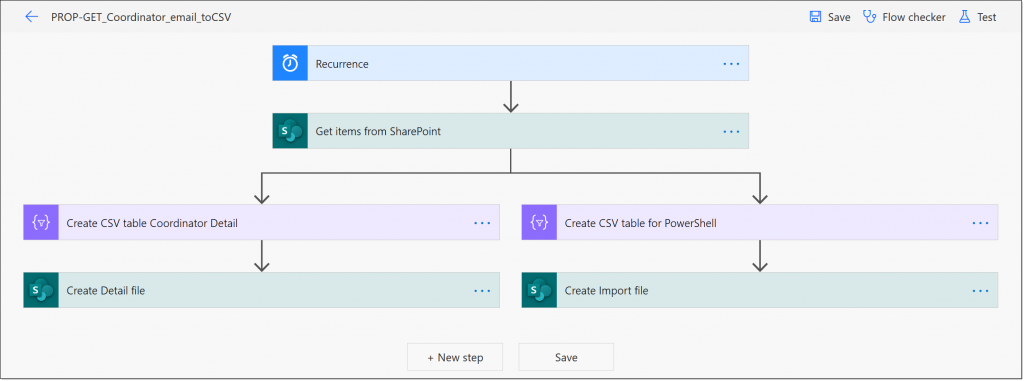
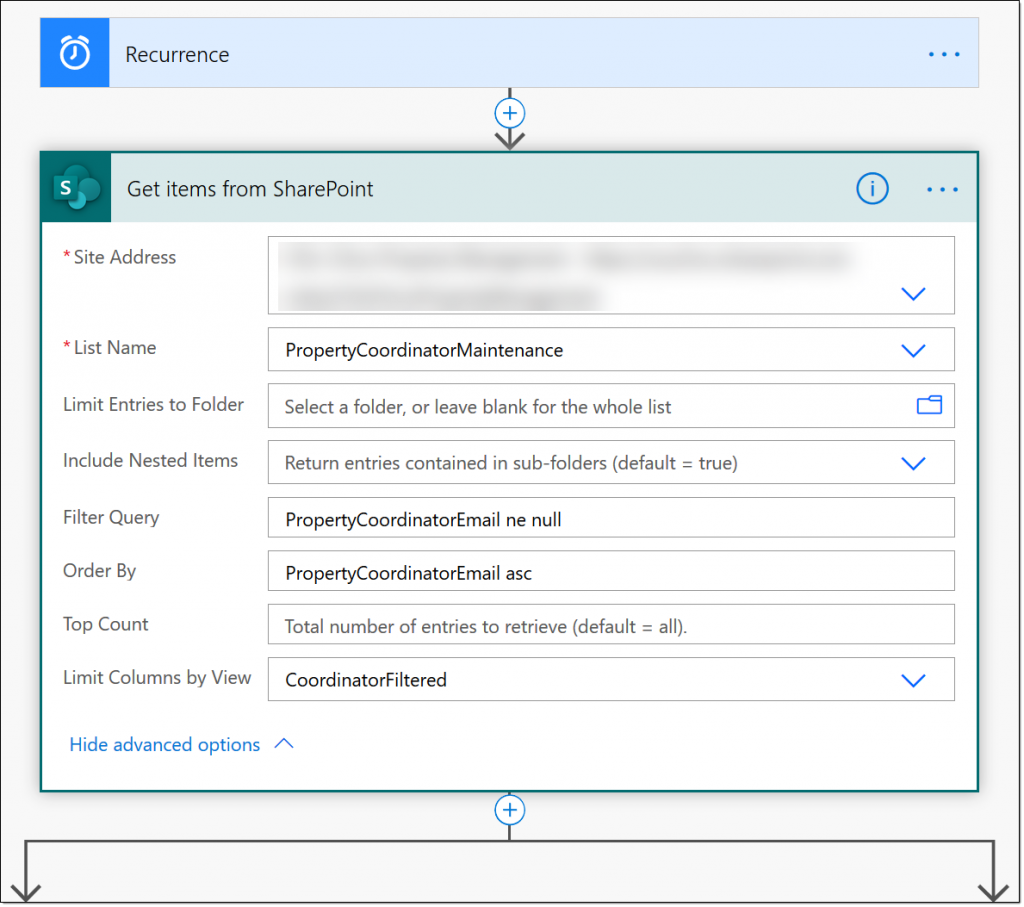
Get Items from SharePoint
I add Filter Query, Order By, and Limit Columns by View criteria to the ‘Get Items from SharePoint’ step.
Using the applied step from above, I create CSV tables with selected columns.

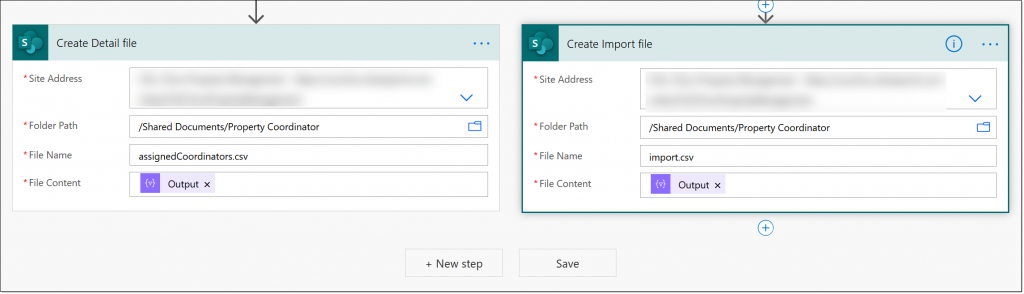
Lastly, create SharePoint files for consumption.
#BetterTogether
How is this #BetterTogether? Three years ago I was using Power Query, Word (mail-merge), Google Forms, and Google Sheets. As you can imagine, a lot of managers and directors asked, “Is this a phishing scam?”. Now we have an integrated and dynamic experience for the user.
Where is Power BI?
This idea was only approved yesterday (04/20/2020) by our accessibility office so I didn’t want to create a Power BI report without knowing if my datasource would even be used. As a Super User in the Power BI Community, it will not take much to get Power BI connected to a SharePoint List and then create a couple of measures for this dataset. There is the other issue, I am one of the few that has a Pro license so embedding into the Power App itself does not do much good.
Where is Teams?
The app is actually in the Teams General Channel. There is a small issue in that I cannot add the Teams O365 group to the app which would give share permissions to the members. I have submitted a ticket to have our tech support to take a look. I also have created a couple of Power Automate flows to ‘Post Message to Channel’ and ‘Post Message to User’ as the flow bot using a SharePoint trigger.
I am excited to see how other folks are doing #BetterTogether!
Chris Mendoza