In this post, I am going to show you how to prepare a data set for a mail-merge using Power Query.
Why would you need this?
Whether it is a hard-copy merge or an e-mail merge, the first request is that the recipient only receives one report or e-mail. That is to say, it is aggregated. If you have ever attempted to create a mail-merge, you probably quickly realized that this is not easy.
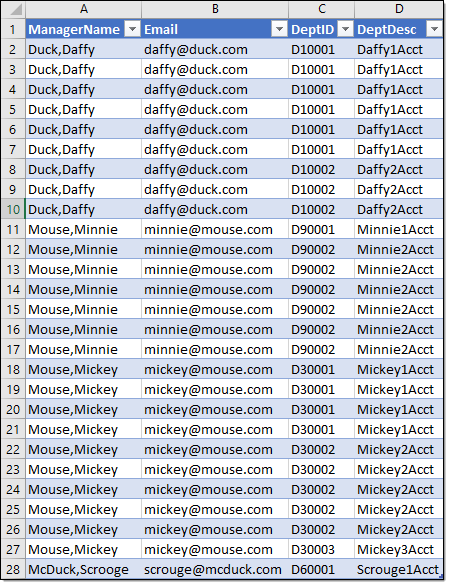
Normally, a mail-merge would create a document/email for each record (i.e. row). Daffy Duck would receive nine (9) e-mail’s in this case. Also, you will notice that Daffy really only has two (2) accounts.
The Goal
Our goal is create a new table that we can use as a merge data source. This table will return each manager, their e-mail, and each DeptID that they are responsible for.

Power Query to manipulate the data
If you do not know how to get your data table into Power Query, read about it in this article Connect to an Excel table or range (Power Query).
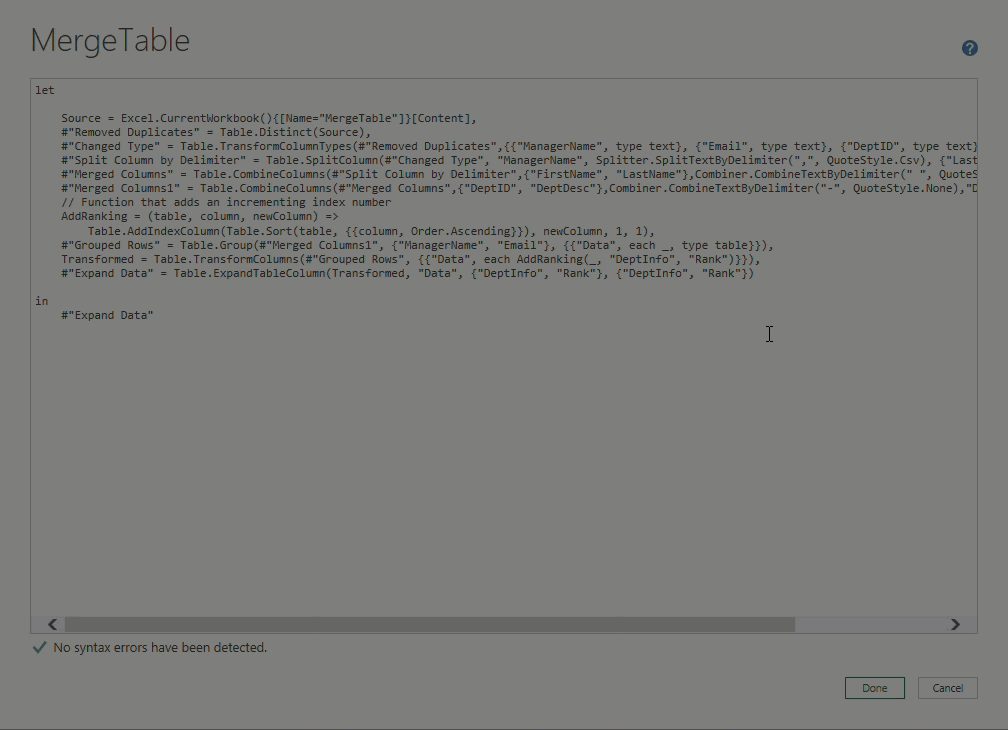
Follow along with the sample TXT file below by inserting the code into the Advanced Editor in a ‘Blank Query
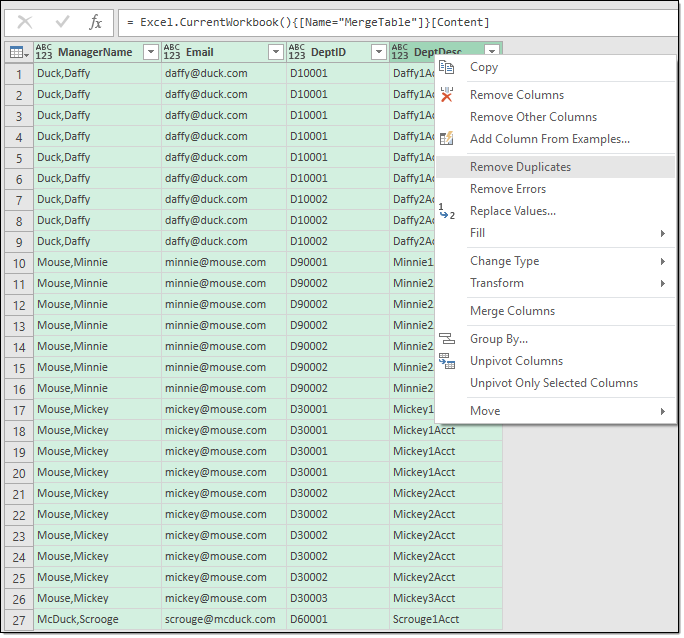
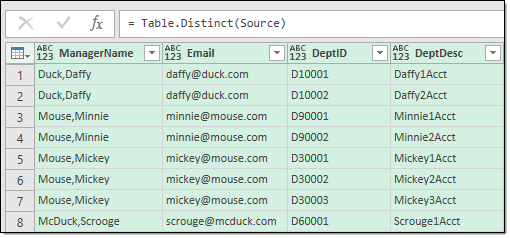
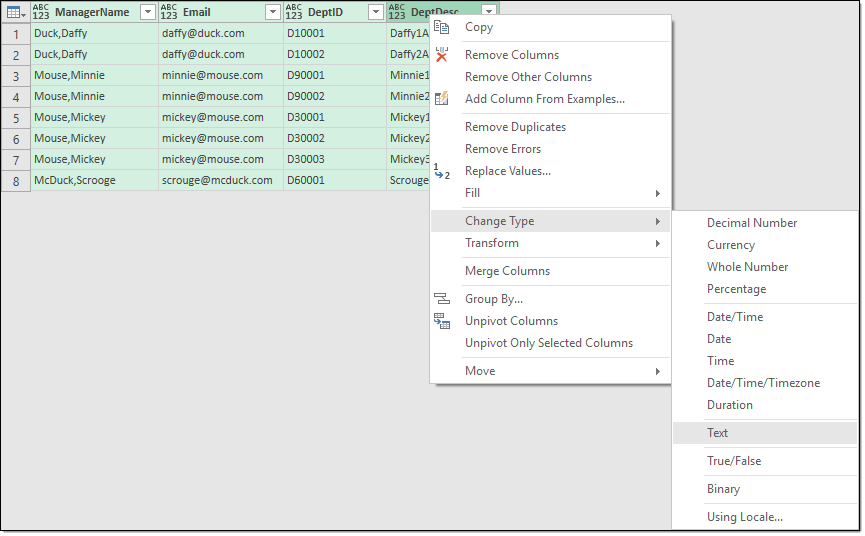
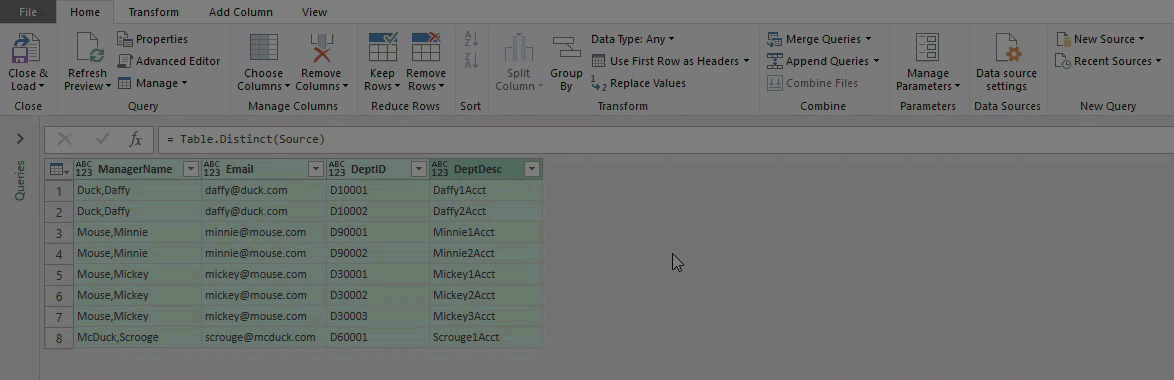
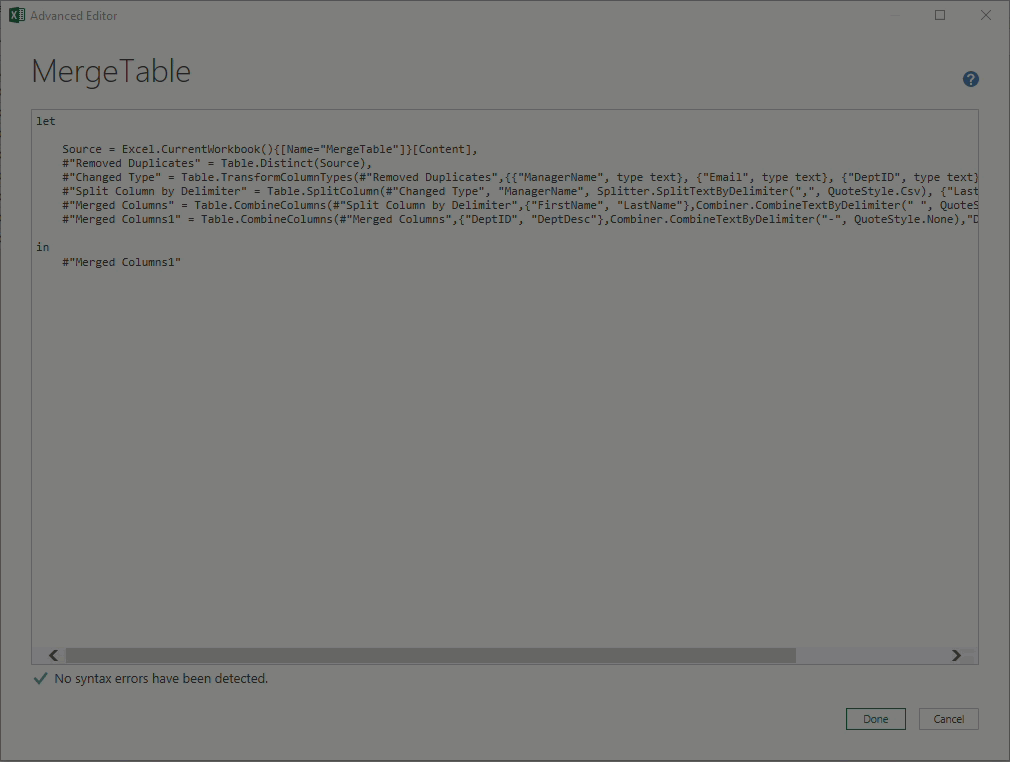
#1 – Remove Duplicates
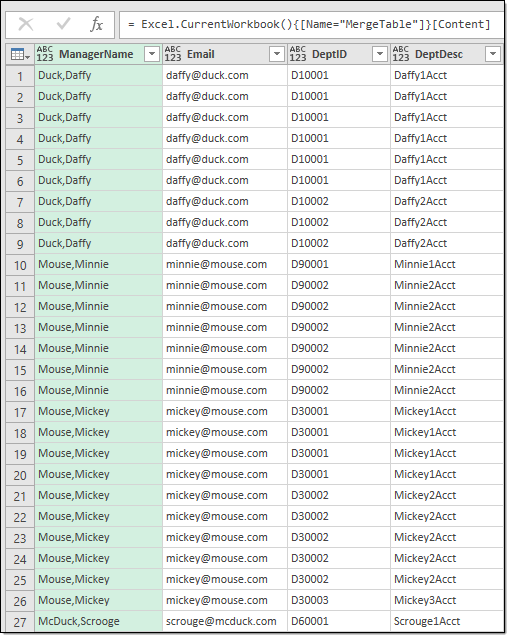
In Power Query, the ‘MergeTable’ source should look like the below image. However, we do not need the duplicate records.
Select the four (4) columns > Right Click > Remove Duplicates
#2 – Change Data Types
This step is rather unimportant in this example as the data does not lend itself to mathematical calculations.
Select the four (4) columns > Right Click > Change Type > Text
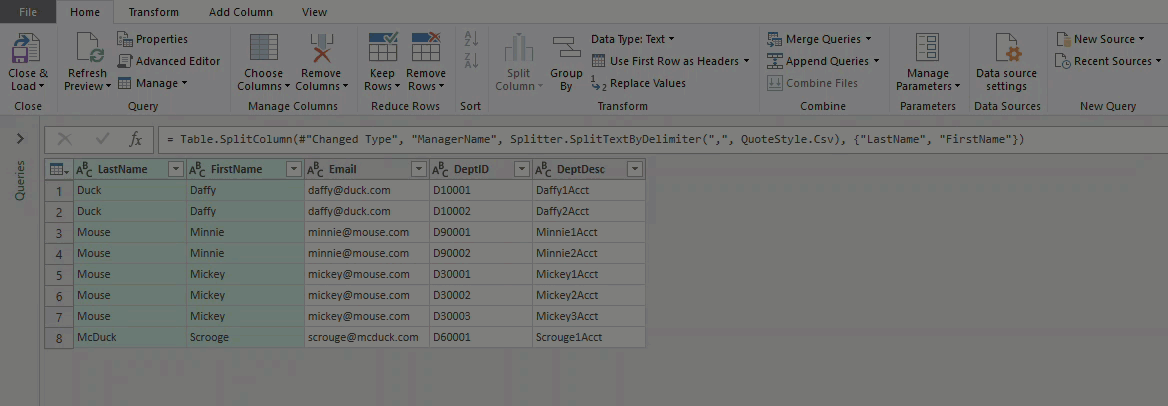
#3 – Split [ManagerName]; Last,First to First Last
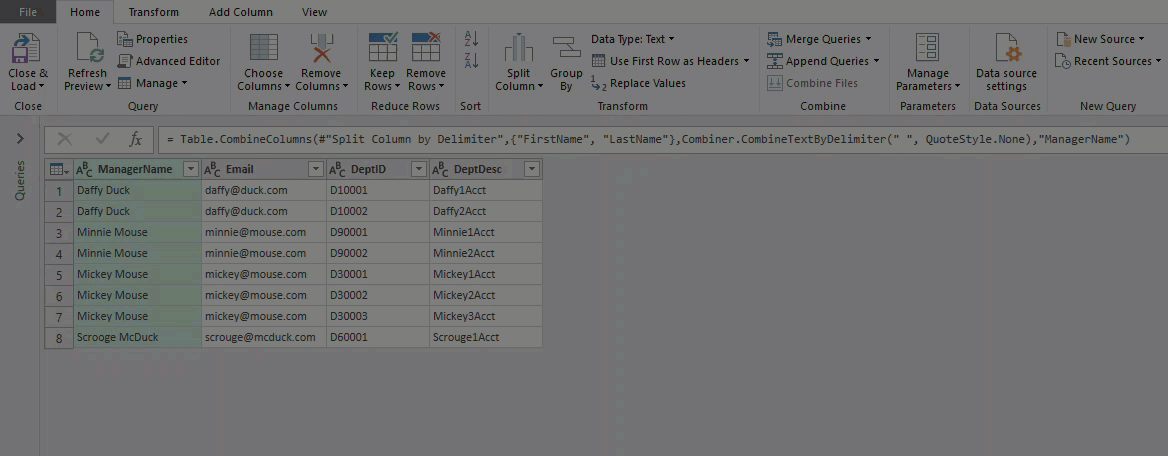
#4 – Combine FirstName & LastName Columns
Note that the order in which you multi-select the columns actually matters.
#5 – Combine DeptID & DeptDesc Columns
#6 – Advanced Editor, Custom Function
At this point, we have only used the interface to create all the steps in the data manipulation. Now we have to roll-up our sleeves and write a little bit of code. Here is the code we’re adding.
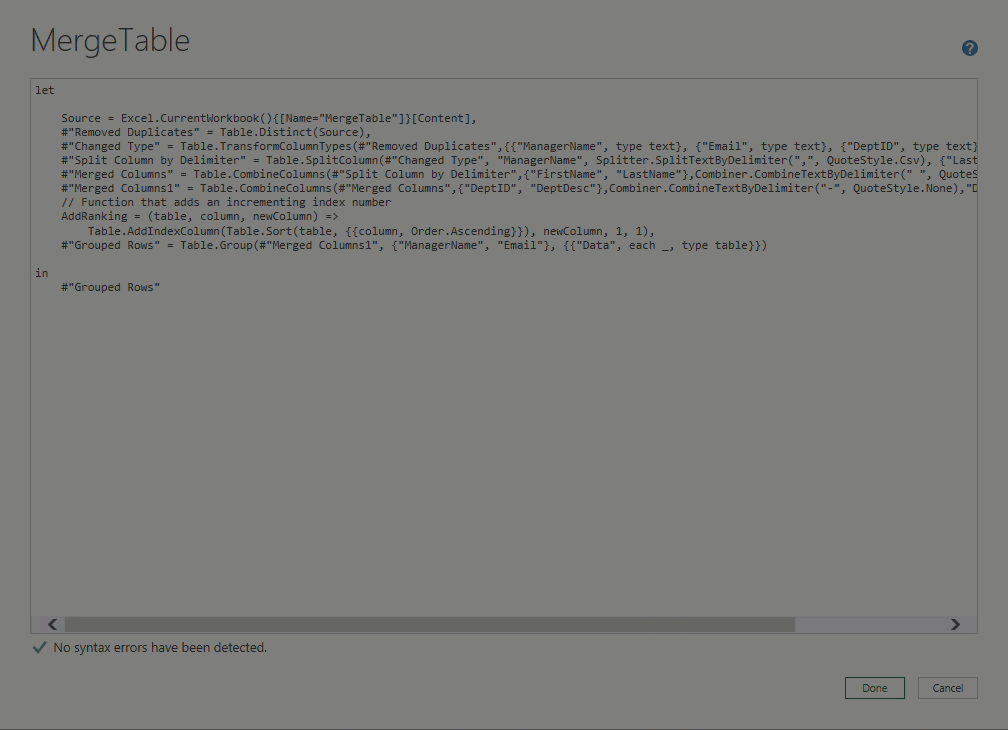
AddRanking = (table, column, newColumn) =>
Table.AddIndexColumn(Table.Sort(table, {{column, Order.Ascending}}), newColumn, 1, 1),
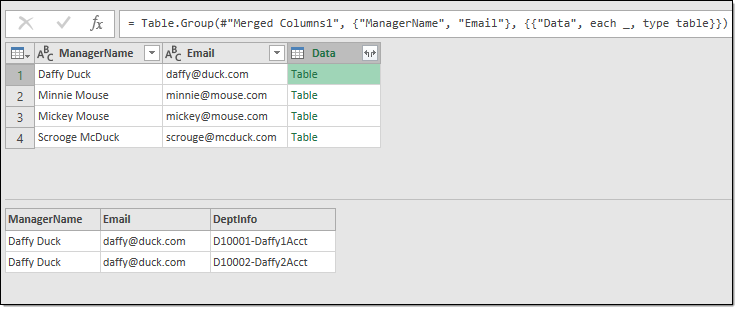
#"Grouped Rows" = Table.Group(#"Merged Columns1", {"ManagerName", "Email"}, {{"Data", each _, type table}})

Take a peek at what is contained within each record’s Table by selecting the cell.
We need to add another bit of code via the Advanced Editor.
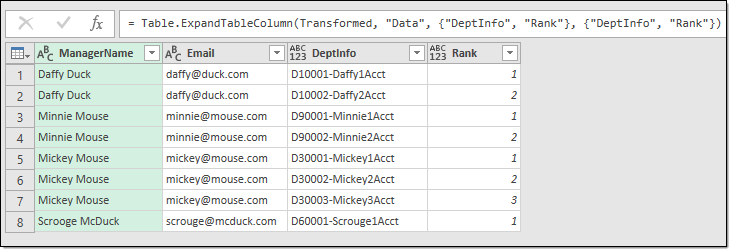
    Transformed = Table.TransformColumns(#"Grouped Rows", {{"Data", each AddRanking(_, "DeptInfo", "Rank")}}),
    #"Expand Data" = Table.ExpandTableColumn(Transformed, "Data", {"DeptInfo", "Rank"}, {"DeptInfo", "Rank"})
#7 – The last bit of code
Just when you thought you were done writing code in the Advanced Editor.
#"Pivoted Column" = Table.Pivot(Table.TransformColumnTypes(#"Expand Data", {{"Rank", type text}}, "en-US"), List.Distinct(Table.TransformColumnTypes(#"Expand Data", {{"Rank", type text}}, "en-US")[Rank]), "Rank", "DeptInfo")

in
    #"Pivoted Column"
The result

The result is a table containing ‘field names’ that you can use in the mail-merge. It may seem like a lot of work but, consider the alternative(s). Maybe, like myself, you would Copy > Paste > Transpose. I did that the first-time around 150 times in the actual data set. After that, I decided to learn how to make the computer do that for me. Hopefully, this will help you in learning and saving time.
Sample TXT File
Feeling brave? You can use TXT file below by inserting the code into the Advanced Editor in a ‘Blank Query’.