In this post, I am going to show you how I can send an email to each person in my mailing list, ask them to make a selection, and collect their response.
Why did I need this?
Do you regularly solve other people’s problems or are you normal? I realize that statement may sound bad however, I look at it as a learning opportunity for myself. I might need to do that thing at some point so I’ll learn how to do it now rather than when I actually need it.
Keep your ‘tools’ well maintained so when you need them you can focus on the task.
Chris Mendoza (unless someone else said this then them)
The Goal
Automate simple survey distribution and responses for recurring dynamic events.
Why not use a form?
Of course you could use a form like Microsoft Forms or Google Forms however, this simple survey only needs to identify who is interested in the upcoming event; basically, a ‘yes’ or ‘no’ response. So let’s hit our recipient’s right in the Inbox!
Power Automate Connectors
In this example, I will be using:
- Excel Online (Business) | List rows present in a table – https://docs.microsoft.com/en-us/connectors/excelonlinebusiness/#list-rows-present-in-a-table
- Office 365 Outlook | Send email with options – https://docs.microsoft.com/en-us/connectors/office365/#send-email-with-options
- Excel Online (Business) | Add a row into a table – https://docs.microsoft.com/en-us/connectors/excelonlinebusiness/#add-a-row-into-a-table
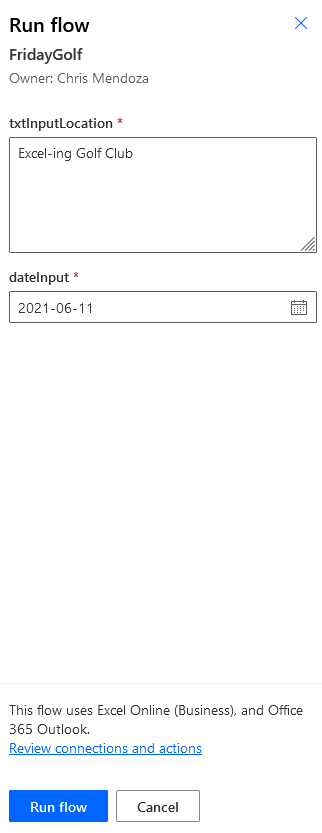
Manually trigger a flow
As the initiator, I will need to provide some inputs to use in subsequent actions. After I have completed the inputs and clicked the button, email’s will be sent and I will wait for responses.
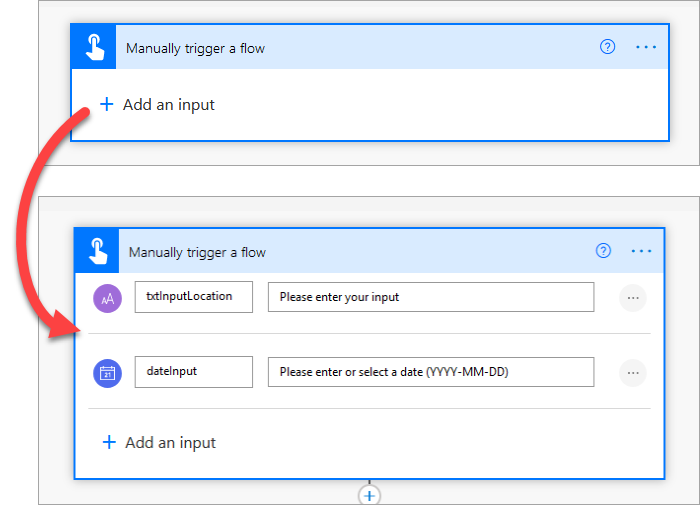
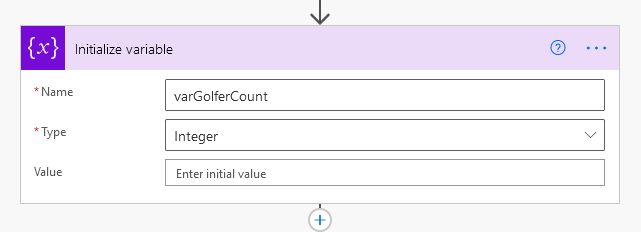
I need one variable
I will initialize a variable of type integer which will be set once the recipient has made their selection.
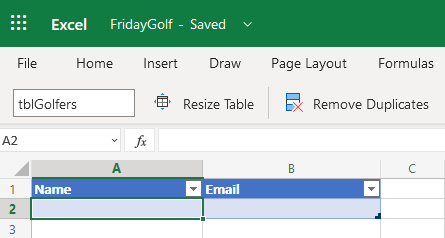
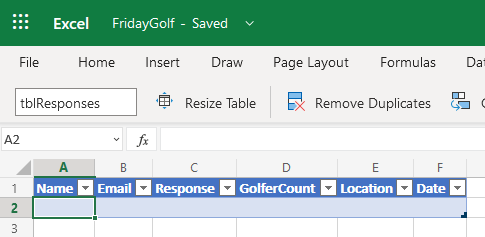
Excel in OneDrive
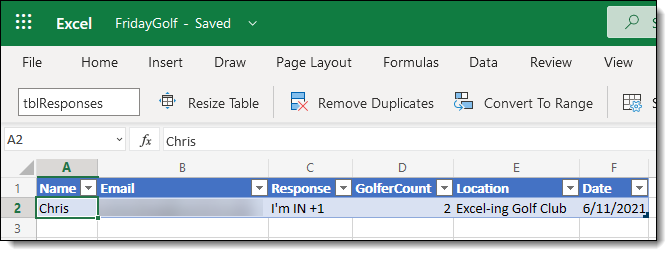
In a workbook called ‘FridayGolf.xlsx’, I created two worksheets; ‘Golfers’ and ‘Responses’.
In Worksheets (“Golfers”), I created a named table called ‘tblGolfers’ with two columns [Name] and [Email]. This table will hold the distribution list.
In Worksheets (“Responses”), I created a named table called ‘tblResponses’ with several columns. This table will be populated with the responses.
List rows in ‘tblGolfers’
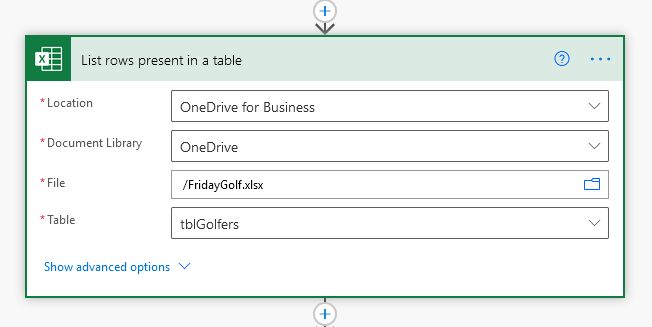
In this case, I did not need any advanced options.
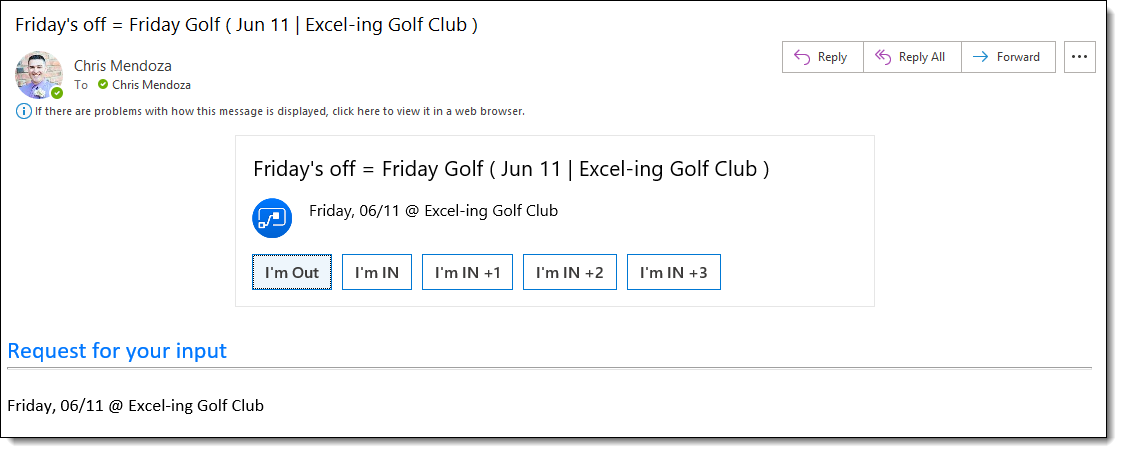
Send email with options
At this point we can add the ‘Send email with options’ action and use the dynamic content from ‘List rows present in a table’; specifically we’re using the [Email] field.
Surprise! ‘List rows…’ returns an array so Power Automate ‘auto-magically‘ creates an ‘Apply to each’ action for you. This is exactly what we need, for each [Email] we want to send an email.
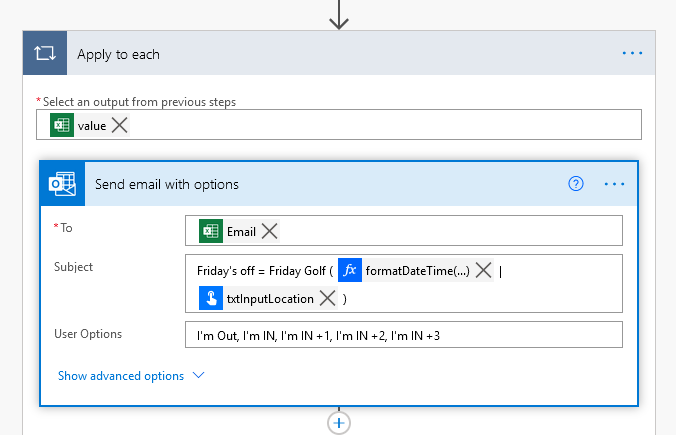
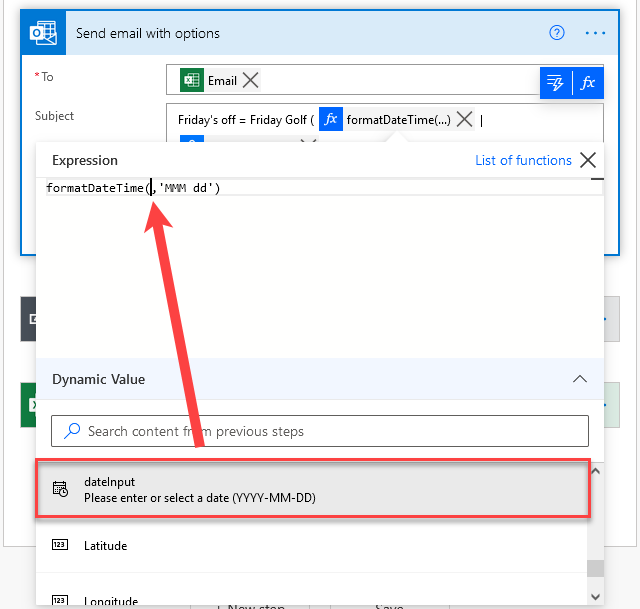
I used one (1) expression in the Subject to change the date format from ‘YYYY-MM-DD’ to a more pleasant representation. I still selected the dynamic content from the trigger event; this is the code that was created for me.
formatDateTime(triggerBody()['date'],'MMM dd')
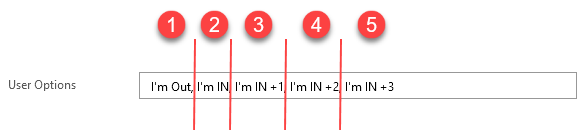
User Options
There are five (5) possible selections that are separated by a comma ‘,’.
Send email with options expanded
I added some content to the ‘Body’ of the email which could have been additional details however, I only formatted the date to include the day name and re-stated the location.
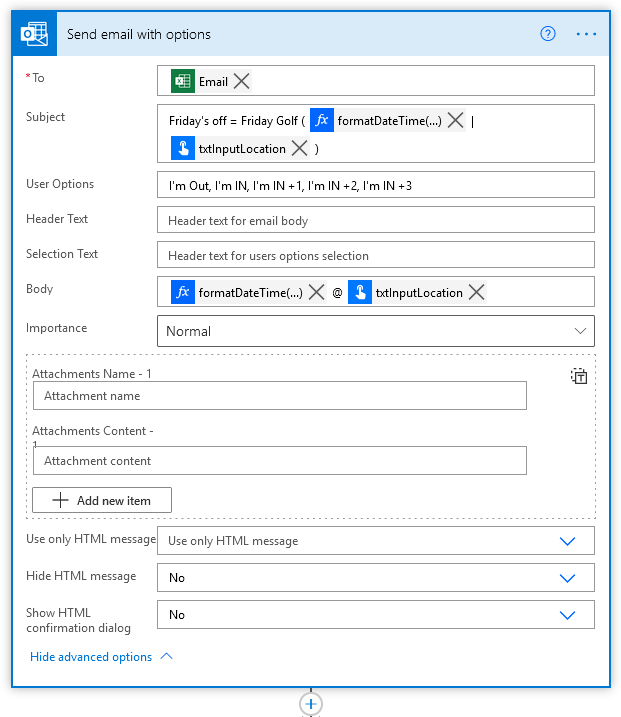
formatDateTime(triggerBody()['date'],'dddd, MM/dd')
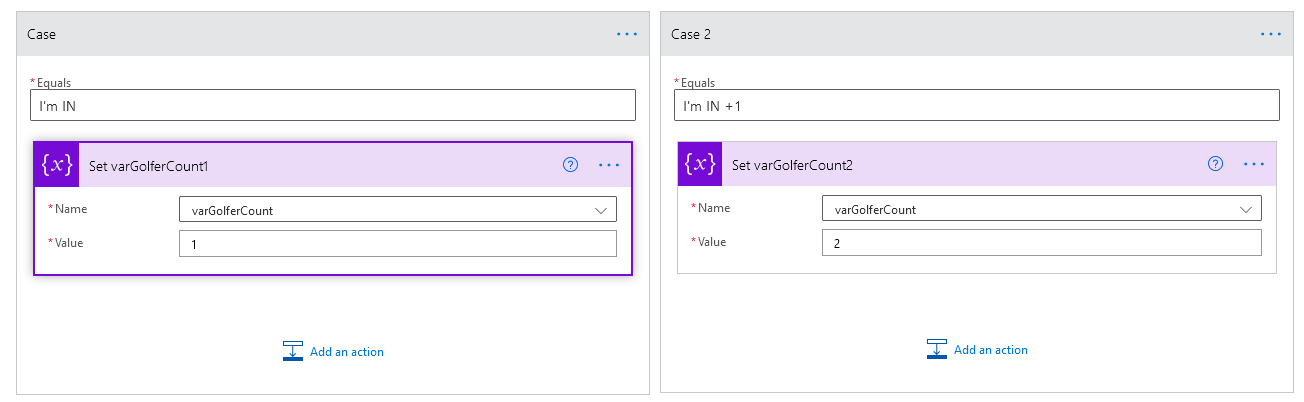
Using Switch
I use the Switch conditional to evaluate the ‘SelectedOption’ and based off of that value I set the variable ‘varGolferCount’.

The article found at https://support.microsoft.com/en-us/office/switch-function-47ab33c0-28ce-4530-8a45-d532ec4aa25e does a pretty good job at describing what is happening. It just looks different here in Power Automate.
Each option sets the variable to a different value
Here is the first two case’s:
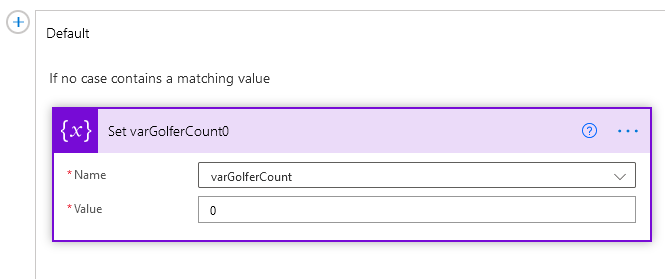
Switch also allows for a default value so I set the variable to zero.
Add the response to ‘tblResponses’
Now I use ‘Add a row into a table’ action to collect all of the dynamic information from all the previous steps.
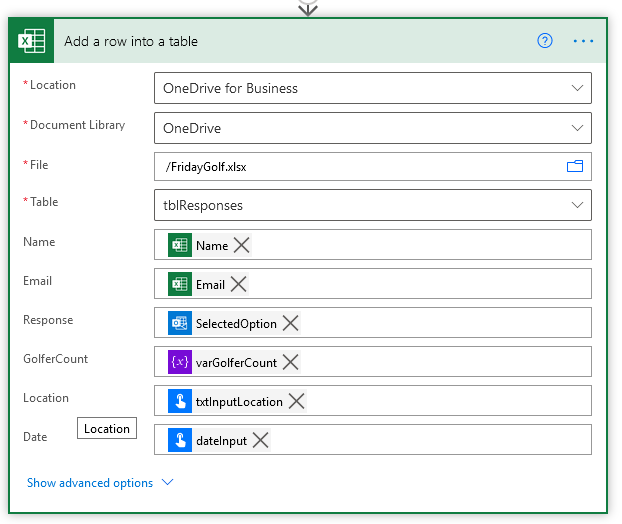
I want to point out these actions are all within the ‘Apply to each’ action.

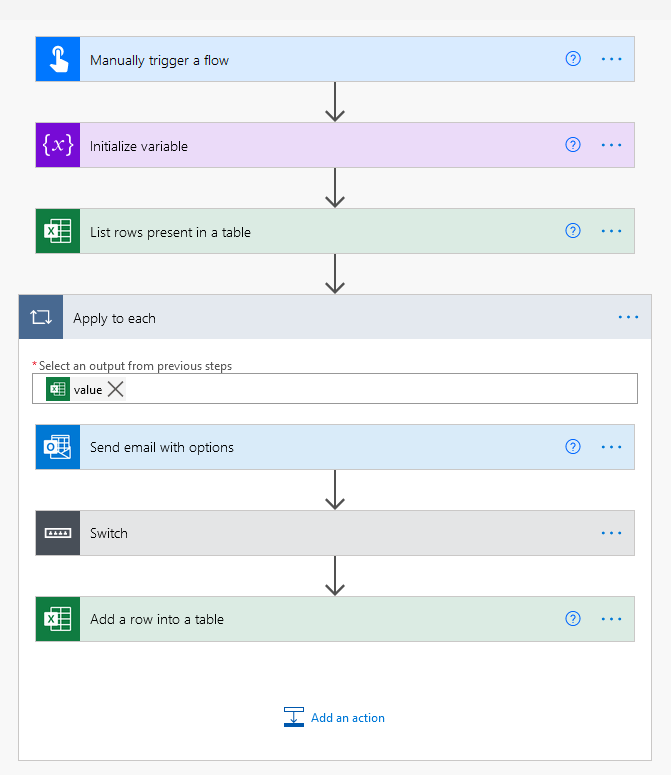
The entire flow
The Result
Good blog! I truly love how it is easy on my eyes and the data are well written. how do you make it like this?
I am glad you enjoy the content! I use Techsmith Snagit for the screen captures. The ‘standard’ object library is pretty good, no need to purchase additional library items. Everything else is handled by the selected WP theme.
Where do the results of the “options” selection collect at? In the above screenshots, we see a spreadsheet, but I am unsure where those results are gathered at.
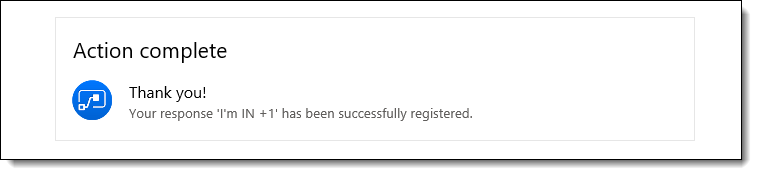
So the notification comes in via email and the recipient has the option to ‘RESPOND’. Once they select a response, where is this information housed?
It’s an output of the body from ‘Send_Email_with_options’ called “SelectedOption”. So it’s in the ‘Apply_to_each’.